Recipes & Tips
Creating a sourdough starter is a simple process that requires just two ingredients: flour and water.
Basic Sourdough Starter
Ingredients:
1 cup all-purpose or whole wheat flour (or a mix of both)
1/2 cup lukewarm water (non-chlorinated)
Instructions:
Day 1:
In your Salt & Seed sourdough starter jar, combine 1/2 cup of flour and 1/4 cup of lukewarm water.
Mix until it forms a thick, but smooth batter. It should be like pancake batter in consistency.
Rest your jar lid on top of the jar or remove the silicone seal, allowing some air to pass through. This will help the healthy bacteria in the environment settle in the mixture.
Leave it at room temperature (ideally between 70-75°F or 21-24°C) for 24 hours.
Day 2:
Check your mixture. You might start seeing small bubbles and a slightly sour aroma.
Discard half of the mixture and add another 1/2 cup of flour and 1/4 cup of lukewarm water.
Mix it well to incorporate the new flour and water, and then re-cover it loosely.
Leave it at room temperature for another 24 hours.
Day 3 and Onward:
Continue to repeat the "Day 2" process for the next several days, discarding half of the mixture and feeding it with fresh flour and water daily.
You should start seeing more bubbles and a more pronounced sour smell as the starter matures.
It can take anywhere from 5 to 7 days (or even longer in some cases) for your sourdough starter to be ready for baking. It will be ready when it's doubled in size within 4-6 hours after feeding, has a strong sour aroma, and is full of bubbles.
Once your sourdough starter is active and bubbly, you can use it to bake delicious sourdough bread or other sourdough recipes.
Remember to continue feeding your starter regularly to keep it healthy and active (every 12 hours if your house is warmer, or every 24 hours if your environment is cooler). You can store it in the refrigerator and feed it once a week when not in use.
Continue feeding by removing half your starter and adding enough fresh flour and water to match the amount of remaining starter (maintaining a pancake batter consistency).
Keep in mind that the environment you create your starter in (e.g., the type of flour, the water quality, and room temperature) can affect the process, so don't worry if it takes a little longer to mature. Be patient and let nature do its work!
Maintaining Your Sourdough Starter
Maintaining a sourdough starter is relatively easy, but it requires regular attention to keep it healthy and active. Here's how to maintain your sourdough starter:
Keep it in the refrigerator: Once your sourdough starter is active and mature, you can store it in the refrigerator. This will slow down its fermentation and reduce the frequency of feeding. Ideally, you should feed your starter, wait 4-8 hours and then refrigerate it when it's in a healthy, active state.
Feeding schedule: To keep your starter happy, you should feed it on a regular schedule, even when stored in the refrigerator. A common maintenance schedule is once a week when refrigerated, or every 12-24 hours when at room temperature (depending on how warm/cold your home is). This can vary based on your preferences and how often you bake with it.
Remove and discard: Before feeding, take the starter out of the refrigerator and let it come to room temperature for an hour or two. Then, discard about half of the starter. This is typically done to avoid overgrowth and maintain a manageable amount. You can either discard it or use it in recipes like pancakes or waffles.
Feed your starter: After discarding, add an equal amount of flour and water to the remaining starter. For example, if you kept 1/2 cup of starter, add 1/2 cup of flour and 1/4 cup of water. Mix until it forms a smooth, thick pancake-like batter.
Let it sit: Allow your fed starter to sit at room temperature for a few hours or until it becomes active. This usually takes 4-8 hours, but it can be longer depending on various factors like room temperature, starter health, and how often you feed it.
Return to the refrigerator: Once your starter is active and bubbly, you can return it to the refrigerator for another week. It can stay in the fridge for a month or more without issues, but you should feed it again before using it for baking.
Use it in your recipes: When you plan to bake, take your starter out a day or two before to give it a couple of feedings at room temperature. This will ensure it's at its peak activity for baking.
Remember that maintaining a sourdough starter is a bit like taking care of a pet; it needs regular attention and feeding. If you ever notice an off smell (like acetone or mold) or if it develops an unusual color, it might need extra care or even a restart. Note: a green/grey liquid on top of your starter is not abnormal if it has been in the fridge unfed for a little while. This is an alcohol the wild yeast creates called “hooch”. This means that your starter is hungry and should be fed. Simply remove this liquid and feed as needed.
Restart your starter if there are signs/scent of mold.
Regular feeding and observation will help you keep your sourdough starter healthy and ready to use in your sourdough recipes.
Basic Sourdough Bread Recipe
Making sourdough bread from your sourdough starter is a rewarding process. Here's a basic recipe for a classic sourdough bread. This recipe assumes you already have an active sourdough starter (see notes above):
Ingredients:
100g (1/2 cup) active sourdough starter
350g (1.5 cups) lukewarm water
525g (4 cups) bread flour or all-purpose flour
10 g (2 teaspoons) salt
1 Tbs olive oil
Instructions:
Mix the Dough (make sure you will be home for the next 2.5 hours)
In a large mixing bowl, combine your active sourdough starter, water, flour, salt and olive oil.
Mix the ingredients until they come together into a smooth, slightly sticky, shaggy dough.
Cover the bowl with a clean kitchen towel and let it rest for 30 minutes. This is known as the autolyse period, and it helps the dough develop gluten.
Stretch and fold your dough. To do this, wet your hands and grab a portion of the dough, stretch it up, and fold it over the rest of the dough. Rotate the bowl as you do this to cover all sides. Repeat 3 more times, with 30 minutes between.
The dough should now be much stronger and smoother. Cover the bowl and let the dough rest and rise (bulk fermentation) at room temperature for 2-3 hours until almost doubled.
Shaping and Proofing
After the bulk fermentation, the dough should have increased in volume and be filled with bubbles. It's ready for shaping.
Lightly flour your work surface and hands, then gently turn the dough out onto the surface. Stretch the dough into a rectangle. Fold the edges into the middle, then roll up the dough creating a ball.
Place the shaped dough into a well-floured banneton (proofing basket) or a bowl lined with a clean kitchen towel (I’ve even used a small-holed colander lined with a towel to allow for airflow).
Cover the banneton or bowl with another towel and let it proof in the refrigerator for 8-12 hours (overnight).
Baking
Preheat your oven to 500°F with a Dutch oven or a heavy oven-safe pot inside for at least 30 minutes.
While waiting for the oven to preheat, gently drop dough out of your basket/bowl onto a sheet of parchment paper (seam side down). Gently flour the top of the bread.
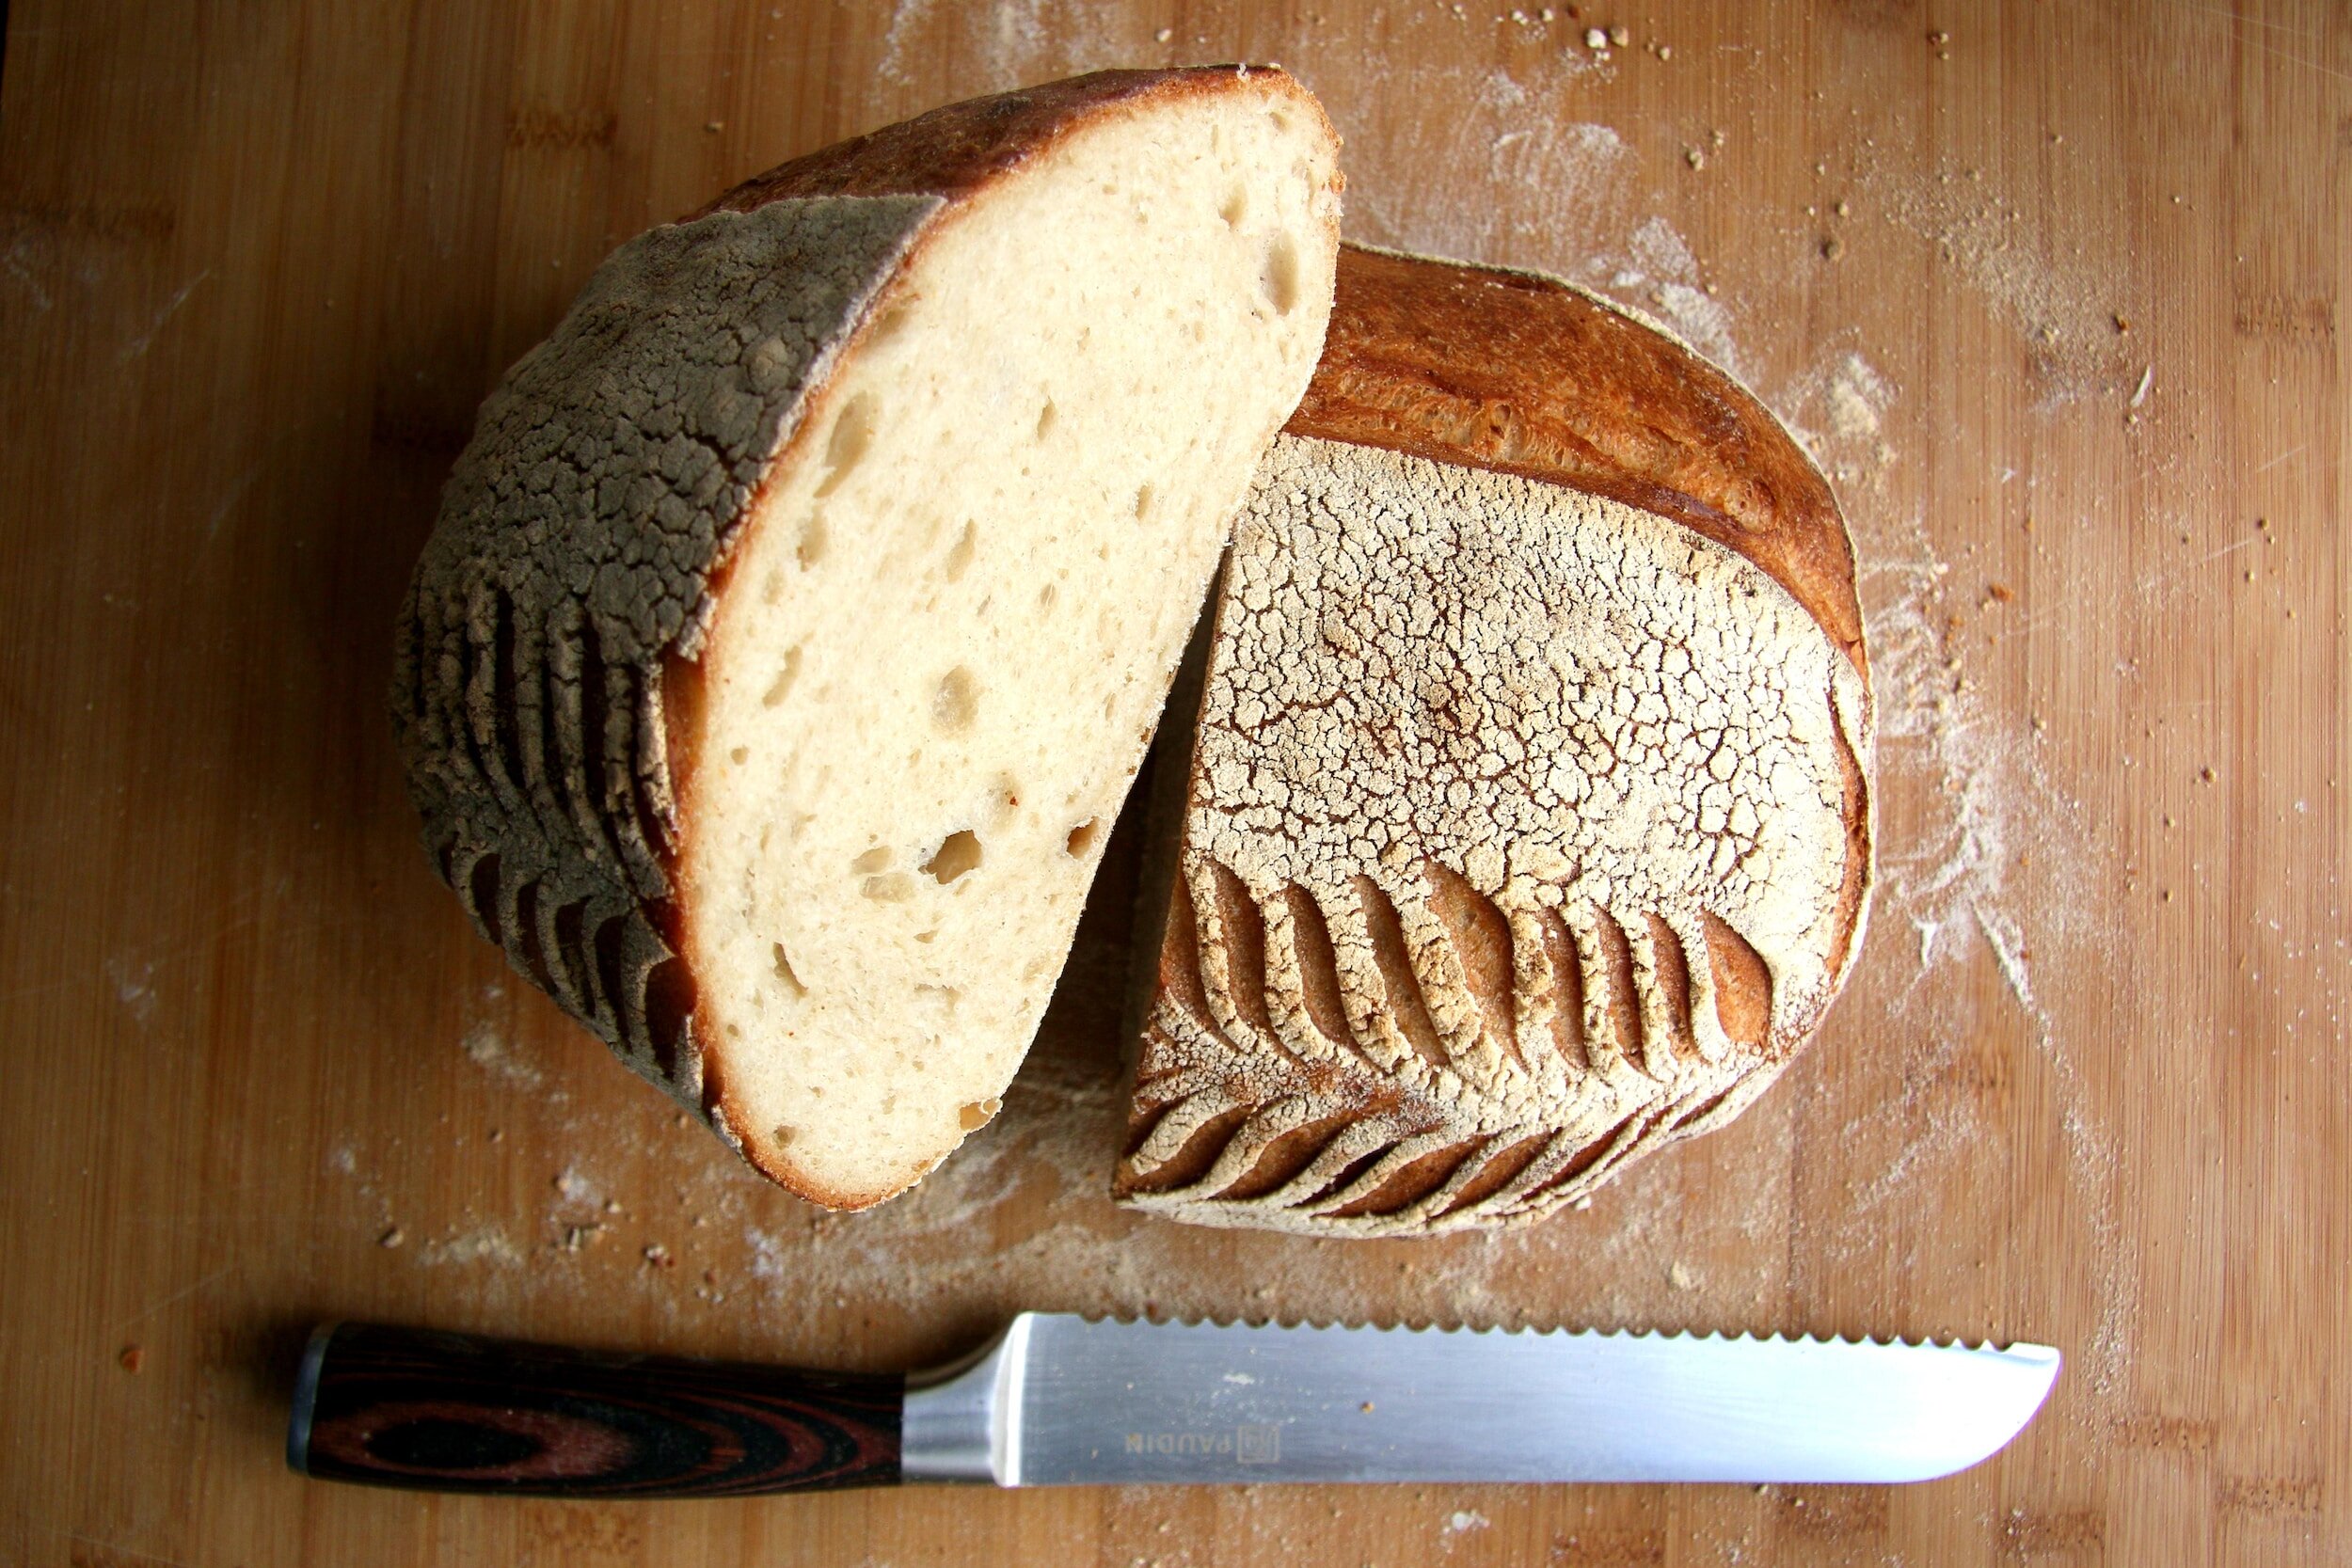
Using a sharp knife or bread lame, score a curved line down the top of your bread- about 1/4 inch deep. Alternatively, get creative and find some fun designs to score into your bread!
Once the oven is hot, carefully remove the pot and place the dough inside, seam side down.
Turn down oven temp to 475°F. Cover the pot with its lid and bake for 25 minutes.
Remove the lid and continue to bake for an additional 10-15 minutes, or until the bread has a deep, golden-brown crust.
Carefully remove the bread from the pot and place it on a wire rack to cool for at least 1 hour before slicing.
Enjoy your homemade sourdough bread! It may take a bit of practice to get the perfect loaf, but don't be discouraged if your first attempt doesn’t look perfect- it will still taste delicious!